Tuesday, 22 August 2017


Lock for canal boats, this section can fold up and down.


Overview showing bottom layer storage siding and control panel. 


Harbour for container ships and tug boats, leading out to the beach and sea.


Sliding door into the mountain to allow access to track. 


Main line over canal. 


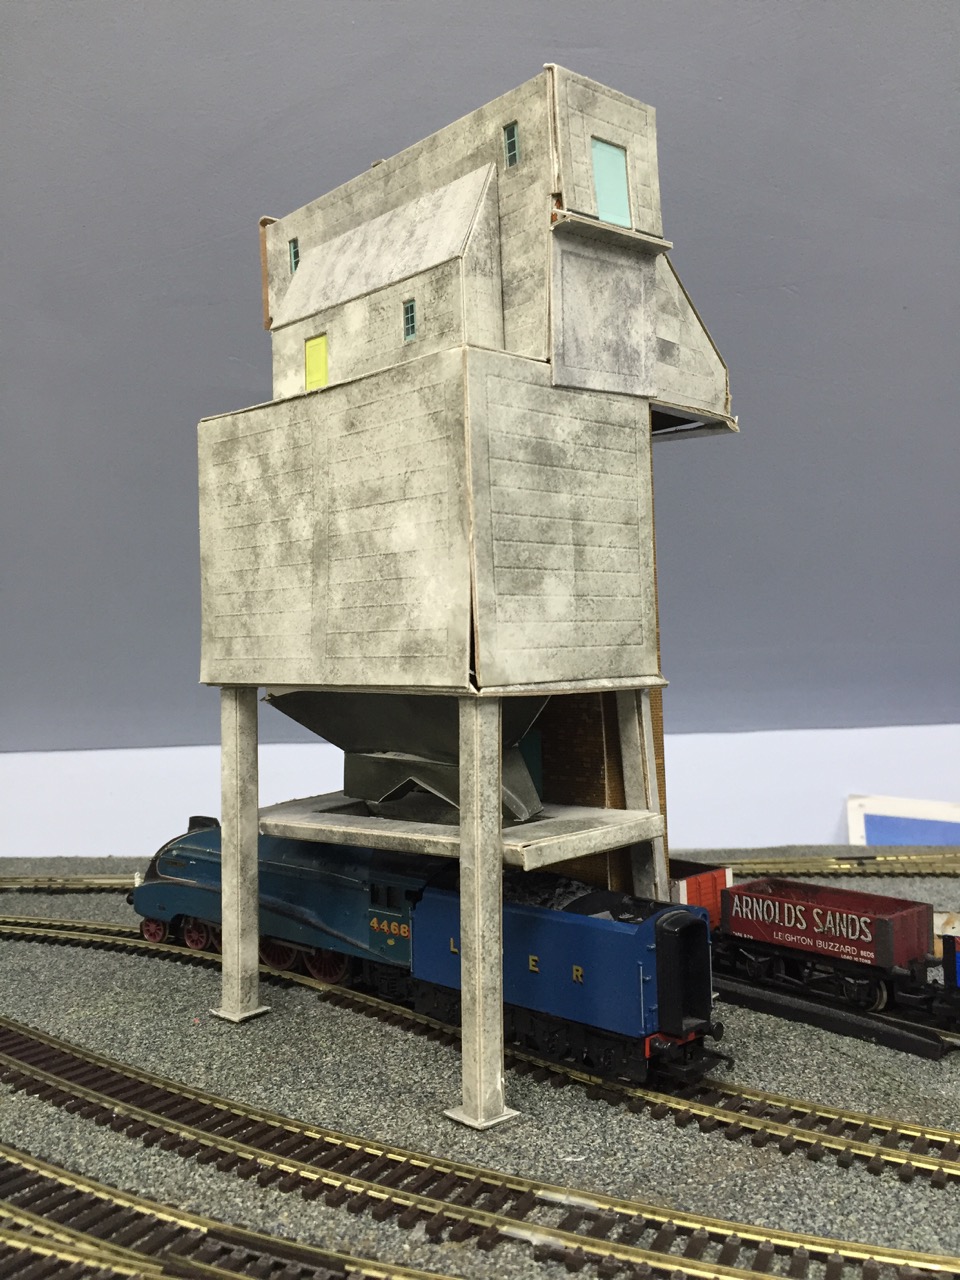
Coal hopper for steam trains. Blue Mallard locomotive below.


Engine shed for diesel trains. 


Canal barge 

Sunday, 30 July 2017


This is a picture of the turntable and at the back are two tracks for coaches and wagons.


This is a picture of level 2,3 and 4


This picture also shows four sidings for steam engines. Two tracks behind it are for coaches or goods wagons.


This is a picture of the coal hopper for steam engines. Also 3 engine sheds for 6 diesel trains and an 11ft train station to be built.


Here you see level one and two for trains that go right round the circle.  The engine shed at the back holds two eleven feet trains.

Thursday, 18 May 2017


This is a view of the level two with a big train station that I am planning just now.


This is a photo of the proposed turntable area linking level 2 with level 3.


This is a picture of 3 double track engine sheds. It is level 2 you see now that I have screwed the boards down so now you cannot see the 13 trains below.
At the far end on your right you see the 009 track being prepared for level 4 scene for trams on N gauge track.  Trams are narrow gauge with 00 gauge bodies but the model I have has N gauge wheels to fit the tracks.  I built these a few years ago.  


This is a close look at level 4 tram line under construction.


This shows you a bit more of the tram line behind the church.


This is a picture of where the 00 trains will go under the bridge and trams above at level 4. The holes are to be covered with lift-of scenery to fix derailed trains.

Wednesday, 15 February 2017


Here you can see a bit of the wall on the left where there will be a hill which can lift giving access to the tunnel in case of derailing.  This tunnel is 5m long and give access all along the tracks.  On top there will be scenery.


This shows you the structure for the mountain which can lift up to give acces for derailing trains.


This shows you the mountain area lifting up and a new section of wall at the back.


This is a picture of a trapdoor so that I can stand on to give me more space. Here it is open.


Here the trapdoor is partially closed.


And here it is fully closed.


This is a picture of the board that is to add more water to the layout, here it is folded down.


Here it is folded up to create water for ships, beach and harbour.


Sunday, 11 December 2016


Here is a picture of a tunnel that can slide open to allow fixing a derailing.  Also you can see the board that will be extending the harbour area with a beach including rocks and hills. It can fold down so that I can bring large items into the attic.


This light panel helps to making the correct point switch, on this picture it is not correct


This is showing yellow lights which means that the switching is correct.

Tuesday, 25 October 2016

Canal section


Here you see the back of the lifted up canal section, for access.


This is a picture of the harbour wall, metal and concrete


This shows the start of building hills on both sides of the track, a cutting.

This picture shows a tunnel which can slide open to allow to fix a derailing.  A mountain will be built on top that allows it to open and close.

This is when it is closed.


The start of scenery on the canal.


This shows you the canal boat and the start of the hill.


This British RailOO gauge AP train from 1979-1985 is an experiment making it by adapting 2 broken coaches to make them into kitchen cars because you cannot buy them at the moment.  


This picture shows you what I was trying to achieve.


This shows you the extension on the right side my friend made including wheels and coupling.  Next I am going to put seats and kitchen car elements into it and finally paint it.


This is the same as the one above.  You can also see level 3 here.


This shows you the train from the other end.  It also shows you two sidings and lifting scenery base.  The plan is to make different scenery to go with specific goods trains.


Friday, 15 April 2016


This is a picture of the control panel, just a start with more to follow.  The lights will show which direction the trains travel, red lights is incorrect setting, yellow light is correct, green light for auto stop for the whole layout. The large switch on the right is the switch for the electric turntable tracks. It will have lights to let you know if the track is lined up.  It is only for steam engines in Britain because modern diesel and electric trains did not have to turn because they had an engine in each end unlike many European trains.  Most places do not have turntables anymore.


This is a closeup of the control panel with lights and switches


Saturday, 26 March 2016

4 layers of track


This is the harbour train station and you can see the bridge also.


Here you can see the main line and a branch line, also the turn table.  This Intercity 125 from 1980 till 1990.  It has 2 kitchen cars, one had got waiters only for first class passengers.  The other kitchen car does not serve food to the table, you have to get your food yourself.  It has 5 coaches and a front and back engine.


This is a closer look at the level 3 harbour station with station buildings.


This is a picture of second lifting bridge door, closed here, with two layers of track.  You can see the baseboard levels, lowest level which will be the harbour, then the next layer is level 2 and then level 3 above


Here is a photo of 4 layers of track


Another view of part of the bridge with Edward Thomson 1948 going over it.  The wallpaper has got texture on it to make it look like water when it is painted.


This is a picture of a tug boat under the bridge before it is painted.  There is a harbour and a big extension bridge also.


A carriage modified to have forward and reverse lights. 


Switch wiring for the point system. 


Red and Green LED's indicate switch direction.